The Finished Product
I’m not going to lie, I’m kind of sad that this project is over. I had so much fun making this tool and it was so rewarding to see it work as intended, nothing quite compares to that feeling. Sure shaders are fun and all, but I really enjoyed the process of troubleshooting my code for ages and then finally realising what’s wrong with it. I feel like I’ve learned so much during this project, from python syntax to how to use an API and make a UI for a tool in Unreal Engine 4.
Anyway, enough talk, let’s get into how to actually use the LOD Validating Tool.
Demo
The Step by Step Guide
The Output Log
The LOD Validating Tool uses UE4’s built in Output Log to display data to its user. Opening it should be as easy as navigating to Window>Developer Tools>Output Log. Make sure you right click>Clear Log before you run the tool, in order to see its output more clearly.
Opening the UI
First of all, make sure your project has the Python Editor Script Plugin and Editor Scripting Utilities plugin enabled. As for the project that I shipped it with for university, it already has those two set up. The tool is located in the Scripts folder (within the Shader Museum project), and it is named WBP_LODtool. To run it, you need to right click it and select the first option at the top, Run Editor Utility Widget. This will then open this UI.

Using the Tool
In order to run the LOD Validating Tool and get an output, you first need to select a Static Mesh in the content browser. With it selected, you can then press any buttons on the tool’s UI and it should output all the information about the mesh in the Output Log.
Okay but what do the buttons do?
I named each button so that what pressing it does is self explanatory, but just to be sure I’ll document that on here as well.
Asset Operations:
Get Mesh Namewill output the name of the mesh(es) you selected in the content browserGet Bounding Diameterwill give you the diameter of the bounding sphere of the mesh(es)LOD Operations:
Get Number of LODsshows the number of LODs currently present on the mesh(es)Get Number of Materialsgives you the number of materials on the mesh(es)Get Number of Triangles for each LODoutputs the LOD indexes and the number of triangles they haveGet LOD Screen Sizeswill give you the screen sizes of the LODs on the mesh(es)Get LOD Vertex Densityoutputs the vertex density for each LOD on the mesh(es), calculated by dividing the number of vertices by the bounding diameter of the LODGet Number of LOD UV Channelsshows the number of UV channels present on each LOD of the mesh(es)Get Vertex Coloursoutputs True/False depending on whether the LOD has Vertex Colours or notCreate Excel Reportwill gather all the data from above and export it as a.csvfile in the same directory as the .uproject fileRemove LODsremoves all the LODs present on the mesh(es)
That’s about it! I tried to make the tool easy to use by providing a simple and intuitive UI. Throughout the next week, I will ask people if they want to try it out in their projects and see how easy it is for them to figure out the functionality, and based on that I might tweak the UI.
Thank you for reading!
So You Wanna Make Tinsel
But how? My first hunch was to try to do it in xGen and seeing how the engine handles it. Here’s where my fellow Character Artist peers came in. I had never really used hair cards or Maya altogether, but man was it fun.
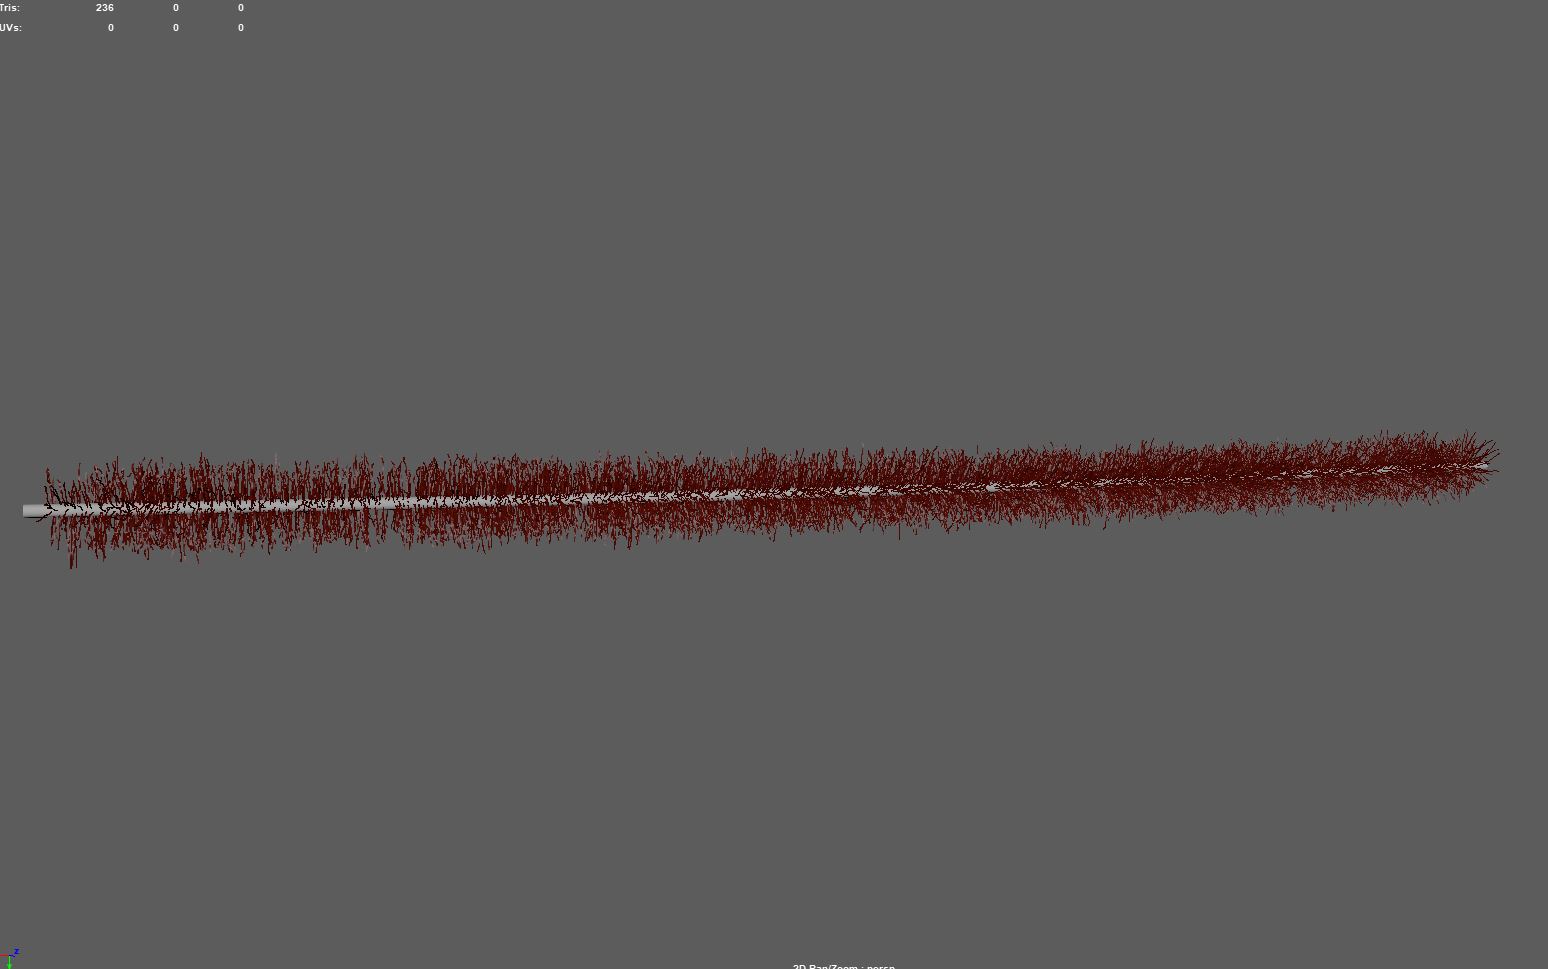
I was a bit lost to begin with, but I picked it up quite quickly and made a few iterations of my tinsel, exported the alembic file and into UE4 it went. But while it looked great in engine, the performance took quite a hit and my level was running at 60 FPS tops with just 4 tinsel meshes in. Not ideal.
I first tried the lazy approach of LODing the groom asset and keeping an eye on the FPS count to see how it affects it. I did gain about 5-10 FPS but in the big picture it didn’t make that much of a difference, as it was very clear that that wasn’t the most optimised way of doing this and any other technical artist would scream if they saw that in my level.
I then decided my next approach would be baking the hair cards onto planes instead and trying again. But instead I made a very quick opacity map in substance designer. I made a very simple masked material in UE4 to try it out, and this was the result:


It looks alright, but it’s not quite there, and my FPS is still only around 80, so at this point I’m still really confused. Each tinsel mesh is now only a few hundred polys, yet the performance is still questionable.
This is when I used a couple trusty profiling tools to check memory and GPU usage, and while 300 MB of textures is quite a lot, this doesn’t seem to be the cause of my issues.
At this point I’m still a bit confused and it’s about 5 PM so time to go home. I close out of Maya and what do I see? 10 FPS made their lovely way back to my counter. I then close out of Chrome and gain a whopping 30 FPS back. 30 whole FPS were eaten my my browser this entire time while I was trying to see what was going on within the engine. What did I learn? When in doubt, just open task manager.
All jokes aside, I did learn a lot and even though it was a little bit frustrating, I would (and will) do it all again. Even though this isn’t my first rodeo with profiling tools, I’ve once again been reminded of how useful they can be.
I know this post was a bit shorter than my usual ones, but I wanted to just focus on my tinsel creation process and all the issues I encountered. Hope to see you in the next one though, take care!
Let’s start with the obvious
My museum needed a face lift. A big one. That was my mission for this week, to try to push the environment a bit further while maintaining focus on the main thing, of course, the shaders.
My plan was to dress up the place a little bit, make it look less empty and cold. Luckily, we had a little feedback session last week where we were able to show our work to our peers and the tutors and everyone was able to speak their minds. I got some really good suggestions from people and I’ll show the ones I put into practice below.
Add Christmas Lights!
Of course. How could I miss that? First thing on the to-do list was to add some nice lights to bring the place together a bit more.
I made a blueprint that uses a timeline to affect the value of 2 separate scalar parameters that control the emissiveness of the lights.
Initially, the way the lights behaved was a bit of a mistake, but before I got a chance to fix it, it really grew on me and everyone seemed to agree, so I left it alone.

Give the Ice Some Depth!
Easier said than done. I’ve been experimenting with ice shaders for weeks now, and nothing really seemed to make me go “that’s it!”. Until now; I’ve finally figured out a way to give the ice depth by first taking a look at a video that explained the theory behind the feeling of “depth” by using vectors to exemplify.
Esentially, the video covered the relationship between the camera vector and the reflection vector (reflection is a mirror image of the camera vector, but it is above the surface) and the relationship with the transmission vector and the reflection vector (the transmission vector is an inverse of the reflection, therefore it is below the surface and gives the illusion of depth). That helped me understand the maths behind it a lot better.
The in depth explanation of the shader setup (nerd alert, read at your own risk) is not all that complicated. I first took the camera vector and transformed it to tangent space, then plugged that into a CustomReflectionVector node along with an engine default normal map in the normal input (it was a bit of a trial and error process to pick the right normal map). I’m then taking the Z (also known as B) value of the custom vector and absoluting it so that any negative value is turned to positive, then dividing that by the same noise I’m applying this whole maths to but multiplied (this gives me the actual depth effect). Then I’m masking the custom vector on the X and Y (R and G) axes and multiplying that by the maths I described above, and then multiplying the entire thing by a little bit more maths that allows me to control the effect based on the resolution of the texture. My texture was 2048x2048 so I used the value 2048 here. (I never used that number so many times in a row in my whole life). I then added that with a TexCoord node and plugged it into the UVs of my noise, then finally blended that with a pale blue colour and plugged that into my base colour.
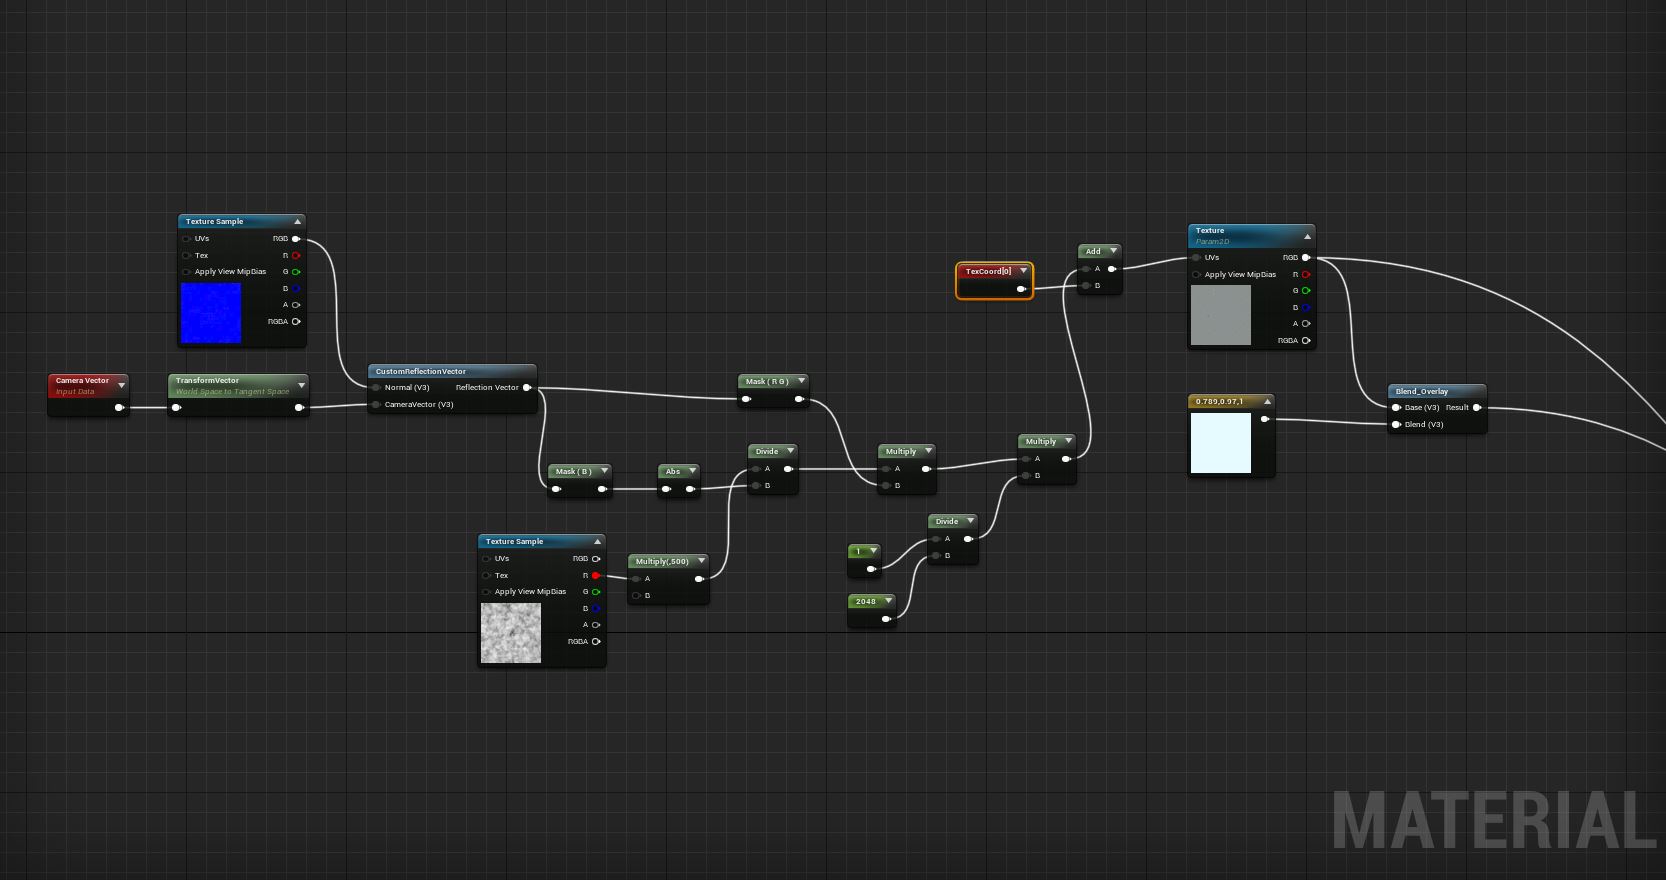
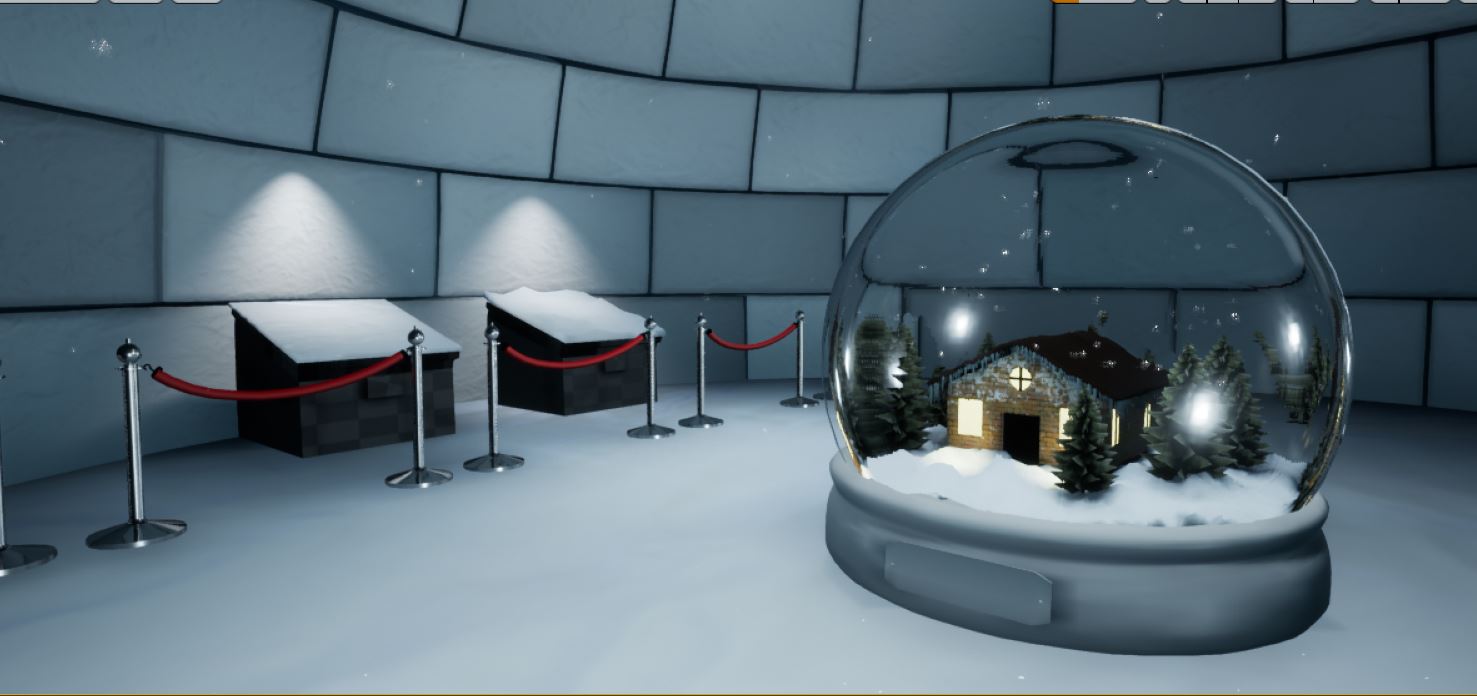
Phew, that was a lot. Moving on, the rest of the shader is stolen from my old ice shader, so the normal, specular and world displacement are the same, I won’t bore you with that again. Finally, take a look at the new and improved effect.
Make an Ice Sculpture
Full credits to my amazing classmate Illias, who took one look at my ice shader and said “why don’t you combine that with glass?”. Good question Illias, I have no clue why I haven’t done this yet. Such a simple yet elegant way of achieving see through glass. I combined the depth effect I described above with a glass shader I previously made and turned it into this gorgeous little reindeer. Yes, the shader is a reindeer.
All jokes aside, check it out.
.png)
The Disappearing Snowglobe
One morning I went to university and said you know what, this snowglobe takes up too much space in the middle of the room. What if I could make it come down from the roof on a platform, that way it would bring attention to the Northern Lights as well when you look up.
I made a blueprint that contained 2 snowglobes, one at ground level and one on the roof. I turned off visibility and collision for the one on the ground then used it to reference its location in the blueprint. I later on learned that I could use a simple trigger box instead of a whole invisible globe, but we live and we learn. I then used a timeline to set the new location of the snowglobe on the roof to the location on the one on the ground. Relatively simple.
The way this works now is it reacts to a trigger box that the player walks into, but I want to set up a button that you can press to trigger this event.
Other Little Changes
I’ve changed the presentation stands to a simpler design made purely to show off the shaders, which has improved the overall look of the museum a lot, as it looks way less cluttered. I’ve added a couple of rectangular lights at the bases of each stand as well, varying the colour based on the look of shader that’s on it.
I’ve also added a hole in the ground that you can “fish” through, but really it’s just to show off my new water shader.
.png)
That’s about it! If you got this far in this post you’re a true warrior and I thank you from the bottom of my heart for reading my nerdy abereations. See you in the next one!
Source Control Is Essential
Over the past year or so I familiarised myself with Git, having used it for code and one Unity project. Being in my final year of univeristy, the last thing I’d want to happen is to lose my progress and have to start over. I initially tried to use it for my university work this year, and while it worked really well for my LOD tool, it didn’t handle my Shader Museum too well.
Git does not like binary files
I learned it the hard way. Whenever I’d push my work from uni and pull it from home, everything would work fine until I pushed from home and tried to work from uni again. Then, everything I had worked on was either completely broken or missing references, or missing altogether. I’m still trying to figure out why that was happening, as my project wasn’t even over 2 GB then.
So then, I figured I have two options: keep the project on Git and never work on it from home, but keep the source control functionality (rather than the “file sharing” side of it) or move my project to Perforce, not have the option to access my project from home through it, but have a good reliable form of source control that handles bigger projects much better. The latter sounded much better, as I would still be able to grab a zip of my project if I need it at home and inject the files I changed back into the project later on at university. Besides, Perforce is industry standard anyway, so this was a good opportunity to familiarise myself with it.
Moving the Project to Perforce
Sounds easy in theory.. right? Wrong. Once more, technology was against me. No matter how hard I tried, Unreal would simply not let me select a Perforce Workspace. I thought it could be an issue with the SourceControl.ini files (UE4 very conveniently likes to create a bunch of these in different locations), as the project had been on git before, but that wasn’t it.
Then I took troubleshooting a step further by trying to connect the same project to source control on a different computer. Surprisingly.. that worked. At least we know it’s not the project that’s causing the issue. So what is it then?
I thought it could be an issue with my User on my machine, so I tried to force a log out using Powershell. But Perforce kept remembering my credentials for some reason. But the mastermind that is our beloved IT support person came up with the idea of resetting my password, that ought to force me out of my Perforce account. And it worked! Well.. more or less. I then had a couple of issues trying to get the scene build data to save, as it kept saying it wasn’t checked out from source control.
It took some more fiddling around to finally get source control to work correctly, but nevertheless I am more than excited to head back to uni on Monday and have the peace of mind that nothing will get corrupted on git anymore. (famous last words)
That’s all from me now, I’m gonna go back to refreshing my grade 11 maths as a fun little exercise over a cup of tea. Aren’t Sundays the best?
Changing the Entire Layout of the Museum
After mainly focusing on code for a good two weeks, I needed to find a way to summon my artistic side and come up with a better looking layout for my museum. That’s when the igloo idea came to my mind, and I didn’t hesitate to try it out straight away.
Luckily, the project brief allows downloading 3D models (all assets are referenced at the end of the post) from the internet so I can focus more on shader creation, which has allowed me to work at a very fast pace. That’s the story of how I’m handing in two almost finished projects at the 4 week mark.
Getting the Layout Just Right
After finding a good looking igloo online, I deleted the top bit and set up the northern lights so you can see them while standing inside.

I experimented a bit with the layout of the presentation stands, intially having a couple on each side of the igloo. That didn’t look quite right in my opinion
It took a bit more playing around to get it right, but I’m quite happy with what I’ve got so far.

I distributed the presentation stands all around the sides of the igloo and kept the snowglobe in the middle of the room so it’s clear that it’s the centerpiece, the one asset that uses all the shaders I created.
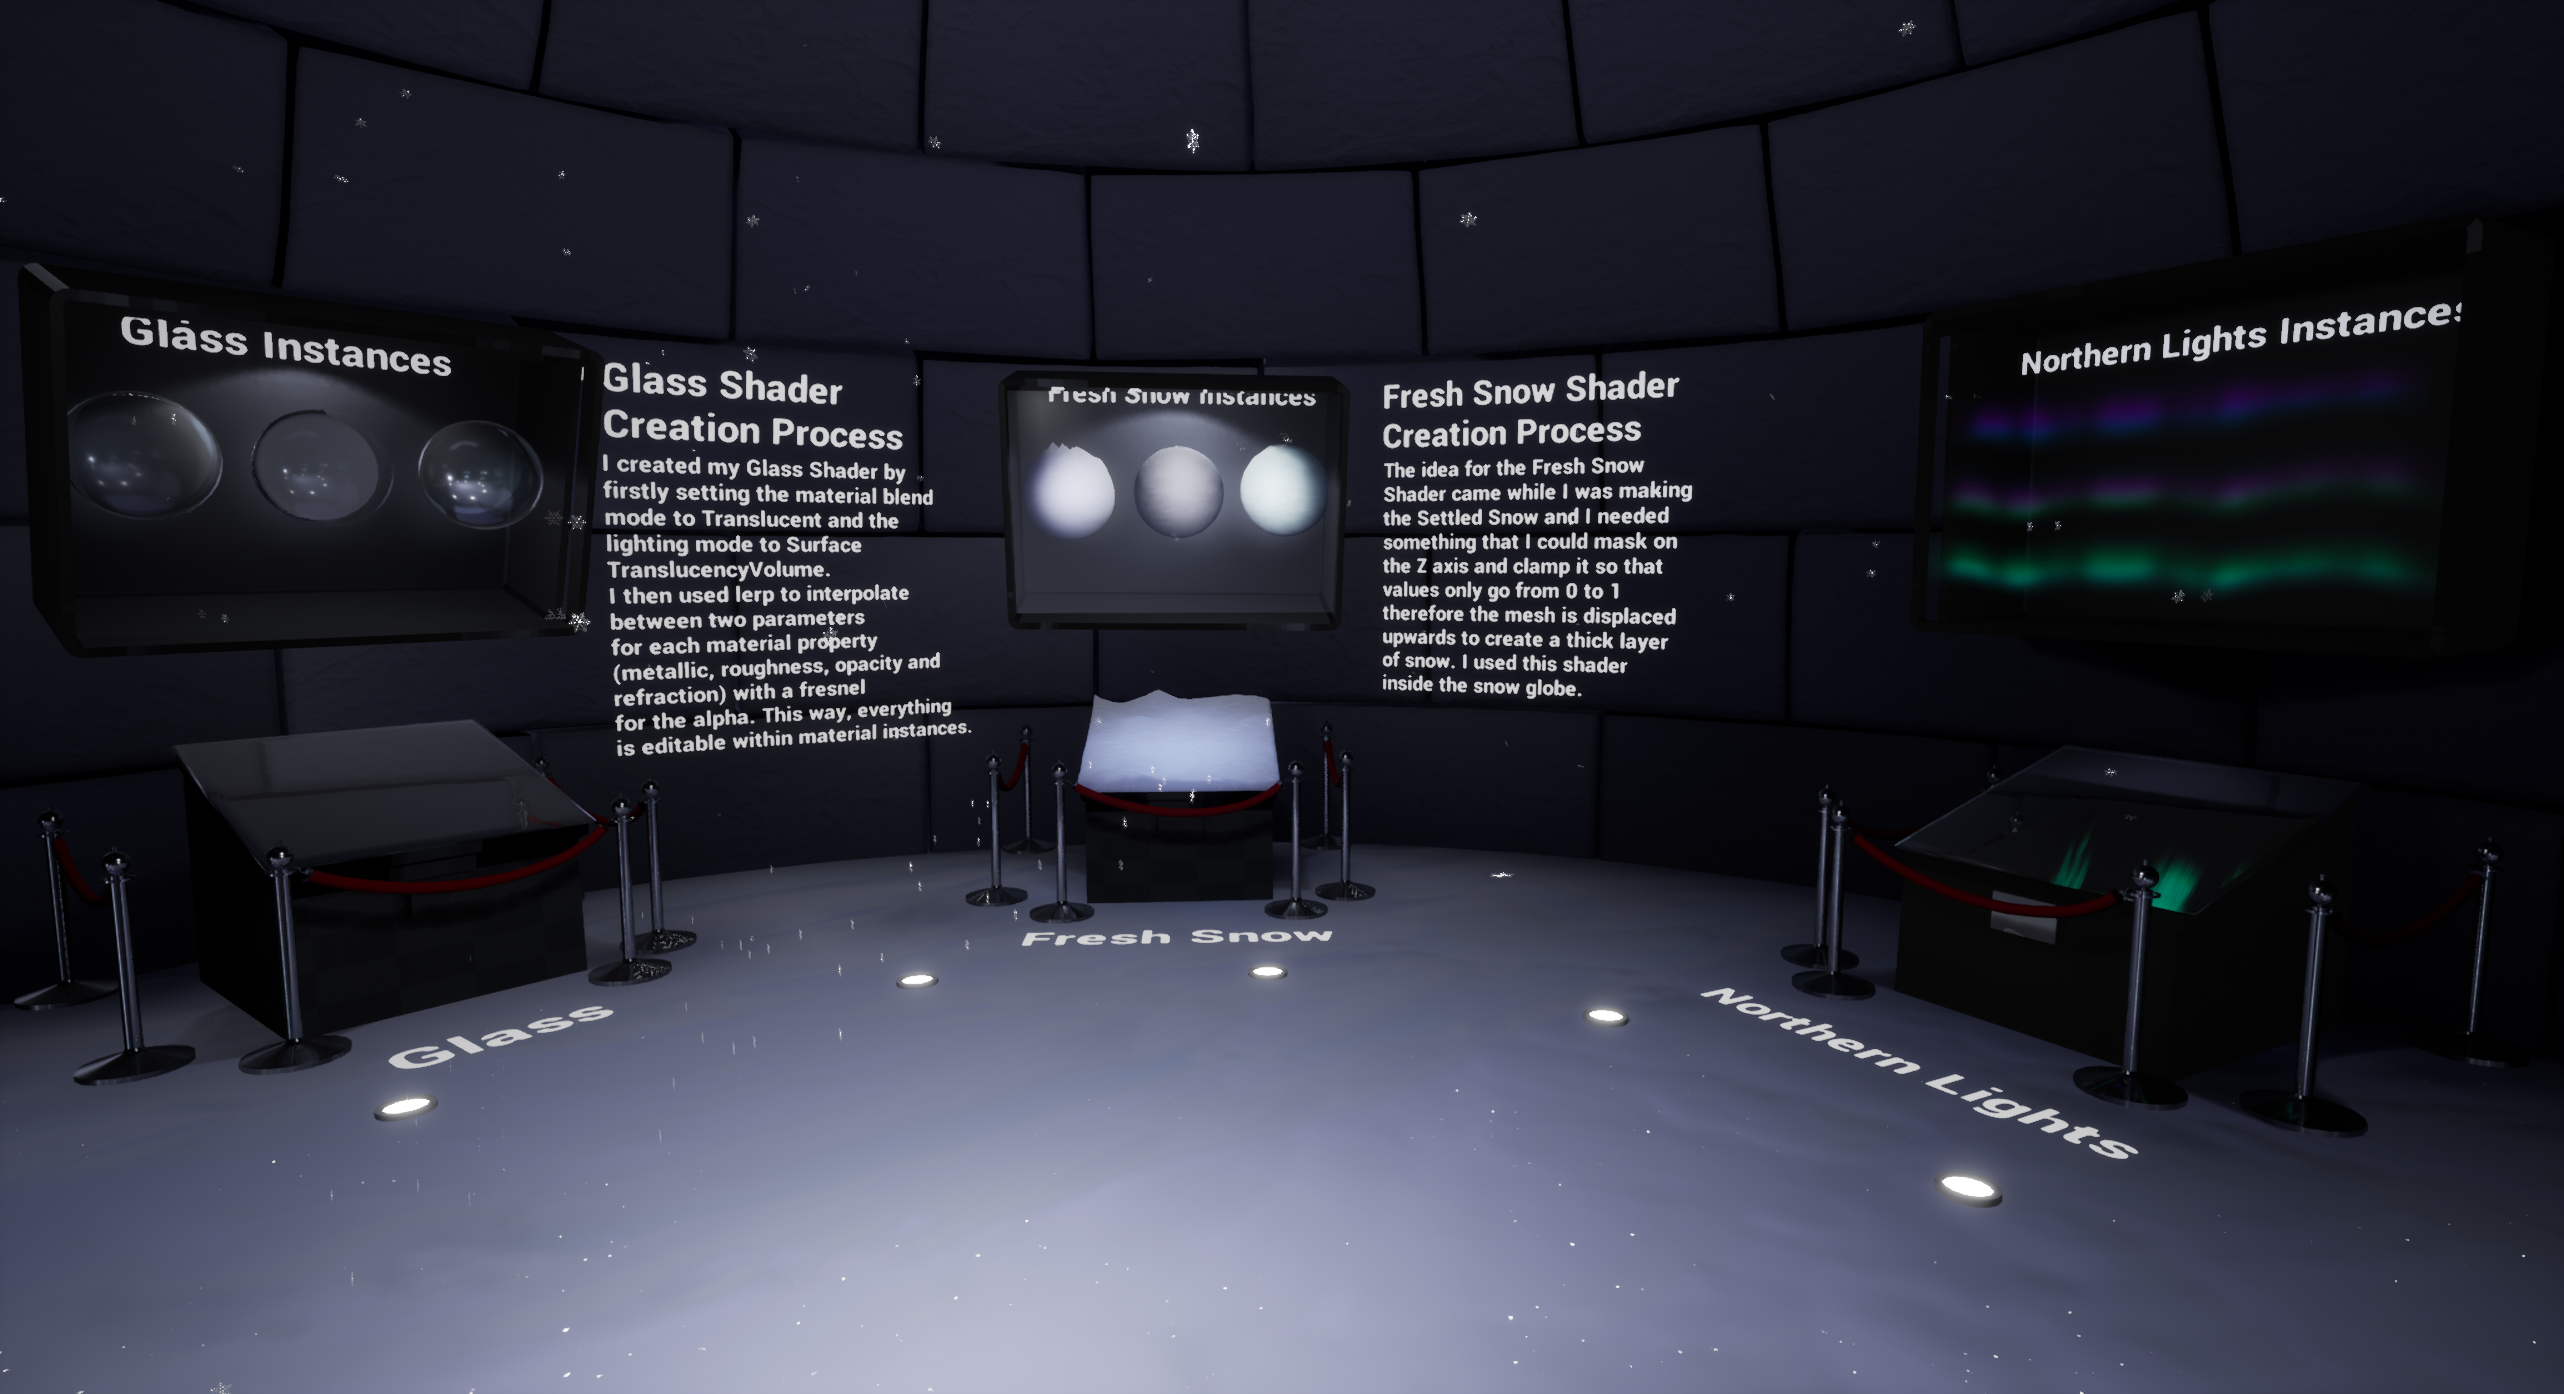
I then added a box above each stand to display some instances of the material, or rather the stages of creation. Like I mentioned in a previous post, iteration is key to good shaders, so I wanted to show that in my museum. Then, to better explain my process, I added text next to each material display. I talked a bit about how each shader is set up and the way they work there, but I will definitely update that when I consider the project finished.
Extra Stuff
One more thing that I really want to do, probably not before today’s submission but certainly before January is to add a little interaction with each shader. A good example of what I’m thinking I want to implement is a slider bar that lets you control how big and sparkly the glitter on the snow gets. I would also like to implement a displacement slider for the ice shader as well, that allows you to make the icicles bigger or smaller.
I’m very pleased with what I’ve achieved in these 4 weeks of university. I’m curious to see what indicative grades I get.