A couple of days ago a friend of mine reached out to me with an idea: a tool that lets you select a material in UE4, and tells you the name and size of all the textures used by it. I thought that could make a great little project to wind down in the evening, so I got to it straight away.
Here’s the code I wrote to make it work:
1
2
3
4
5
6
7
8
9
10
11
12
13
14
15
16
17
18
19
20
21
22
23
24
25
26
import unreal
import re

selected_assets = unreal.EditorUtilityLibrary.get_selected_assets()

for sa in selected_assets:
    if sa.get_class().get_name() == "Material":
        textures = unreal.MaterialEditingLibrary.get_used_textures(sa)
        x = []
        y = []

        for texture in textures:
            sizeX = unreal.Texture2D.blueprint_get_size_x(texture)
            x.append(sizeX)
            sizeY = unreal.Texture2D.blueprint_get_size_y(texture)
            y.append(sizeY)

            texture_path = re.match(r"<Object ('.*?')", str(texture)).group(1)
            texture_name = texture_path.split("/")[-1].split(".")[-1].strip("'")

            print(f"{texture_name}: {sizeX}x{sizeY}")

        final_sizeX = sum(x)
        final_sizeY = sum(y)

        print(f"Total texture size: {final_sizeX}x{final_sizeY}")
I used regular expressions to output the name of the texture correctly to the user, as before it would show the path of the texture and the memory address as well.
Here’s how it works in engine:
That’s it! Tool shipped the same night, friend was happy, and I got to experiment with a new concept (regular expressions). I wonder what my next project will be. I will be taking a break during Christmas, but hope to see you on here again soon!
I thought it would be time to give a proper update on all the projects I have going on at the moment.
Shader Museum
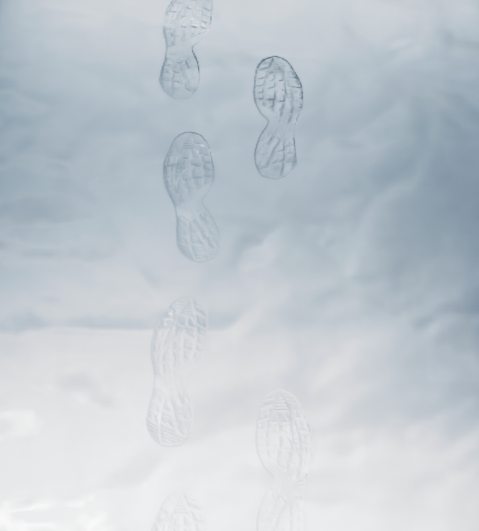
Although this project is basically finished, there’s a bit of cleaning up to do in terms of all the shader iterations, and perhaps some optimisation to the shaders themselves. I decided to put this project on stand-by for a while and re-visit it after a couple of weeks, but then I remembered I wanted to animate some footsteps on top of the settled snow display.
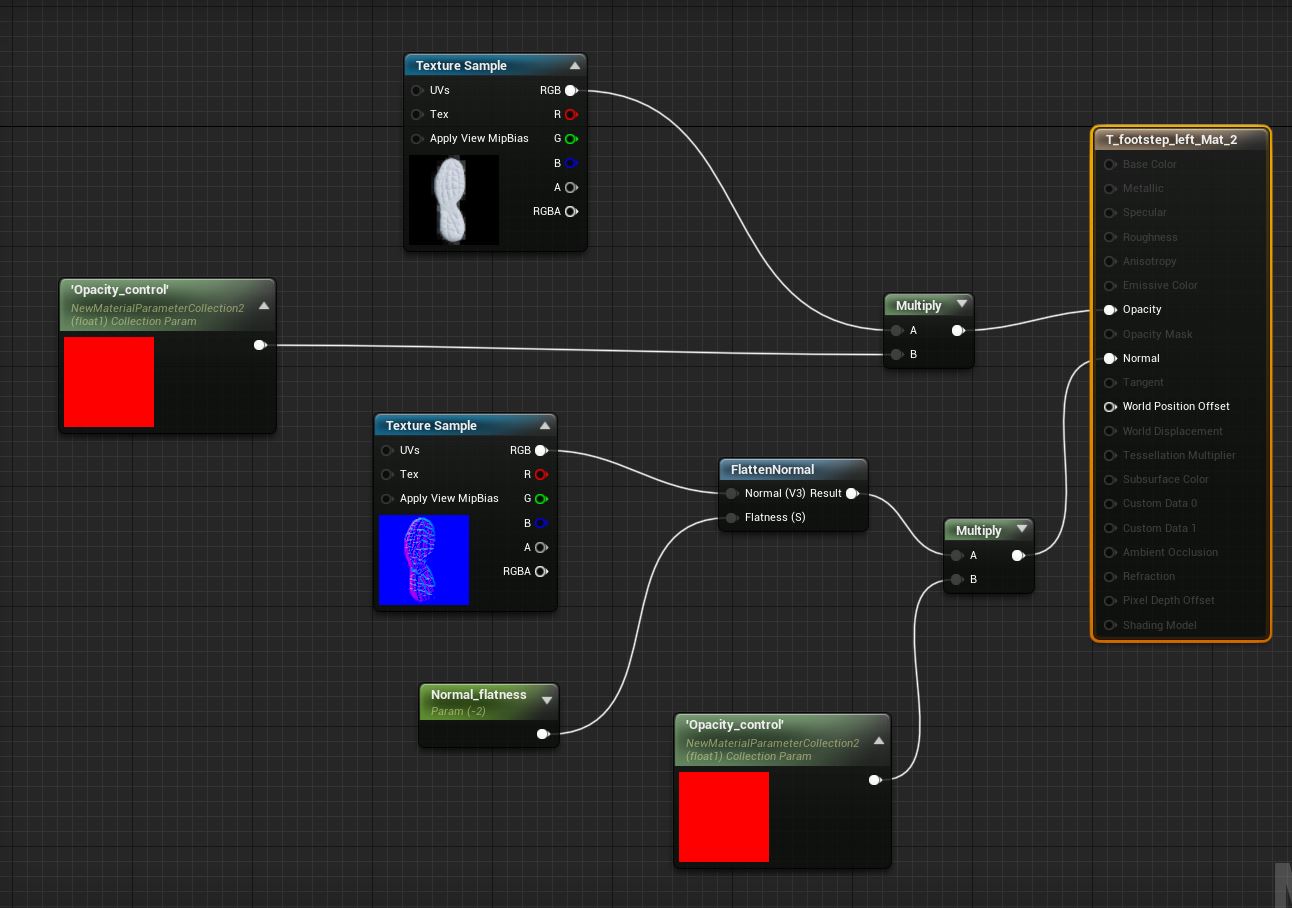
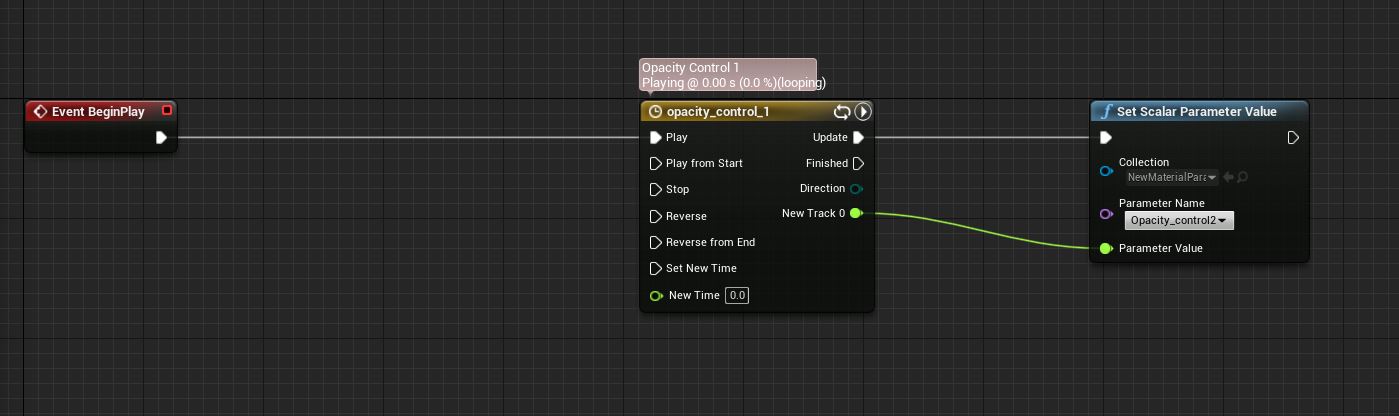
The way I did that is by controlling the opacity of a decal using a material parameter collection scalar within a blueprint. Very quick and easy way to get this effect, but I’m sure this could be achieved in other ways as well.
Here’s how I set up the material and the blueprint:
And here it is in action:
Zen Room
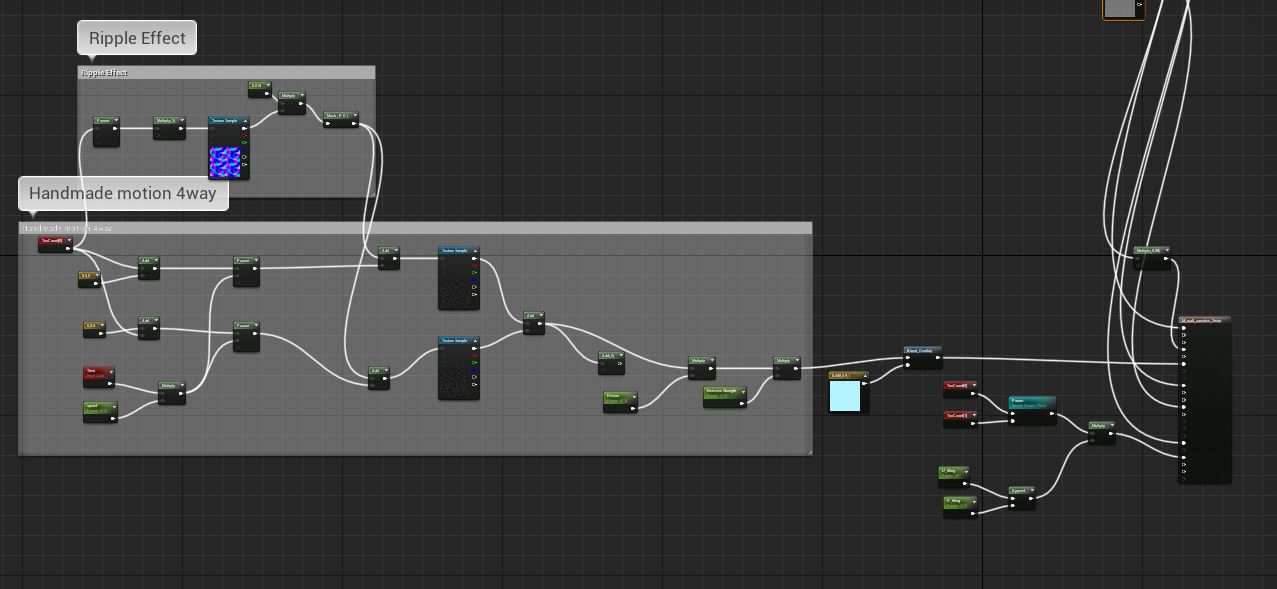
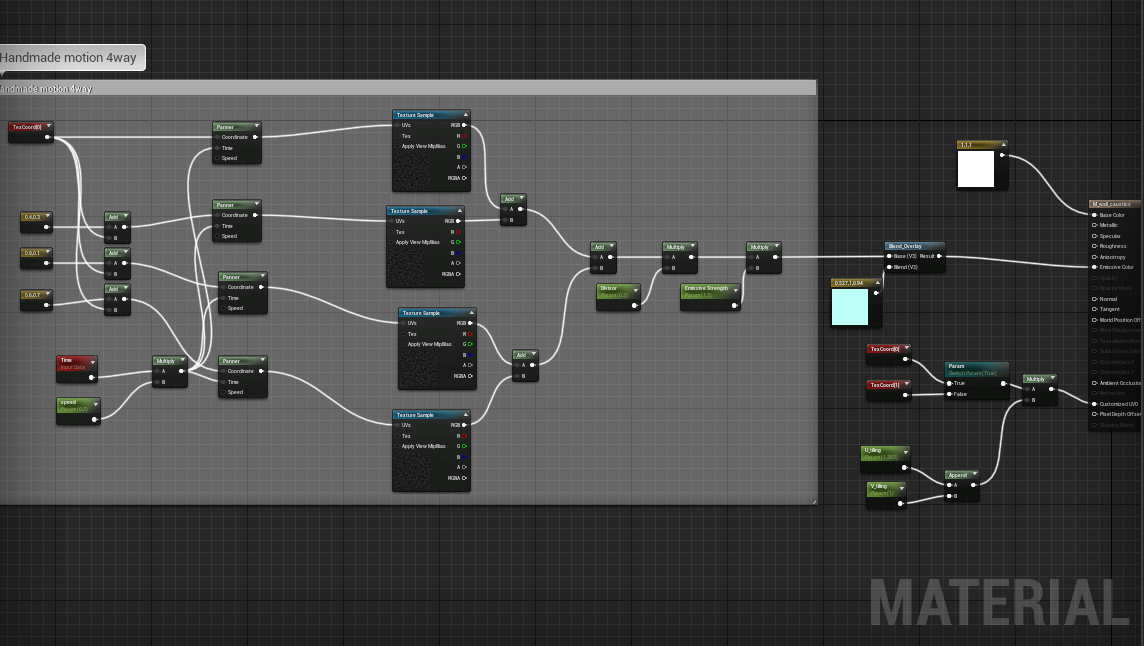
After careful consideration and a bit of research, I decided that my handmade Motion 4 Way was a bit overkill, so insted I made a so called Motion 2 Wayinstead. It does exactly what it says on the tin, it creates the same sort of effect but only using the texture twice. I offset them both by (0, 0.5) and (0.5, 0) respectively, and made sure that they’re panning in opposite directions, and vois-la:
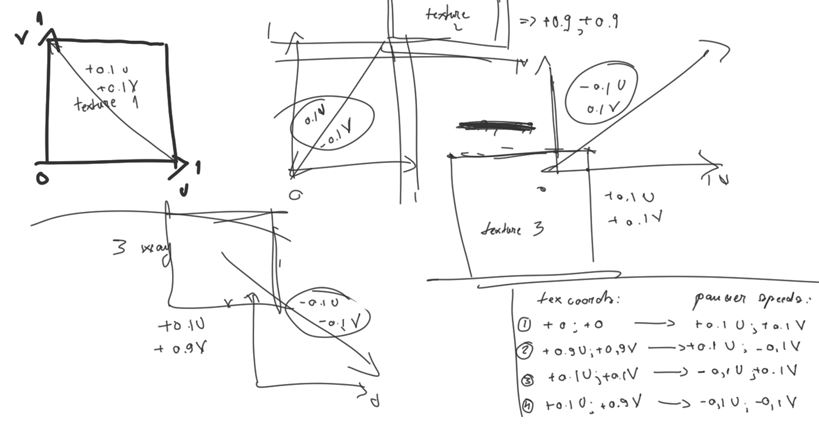
And my wird thought process:
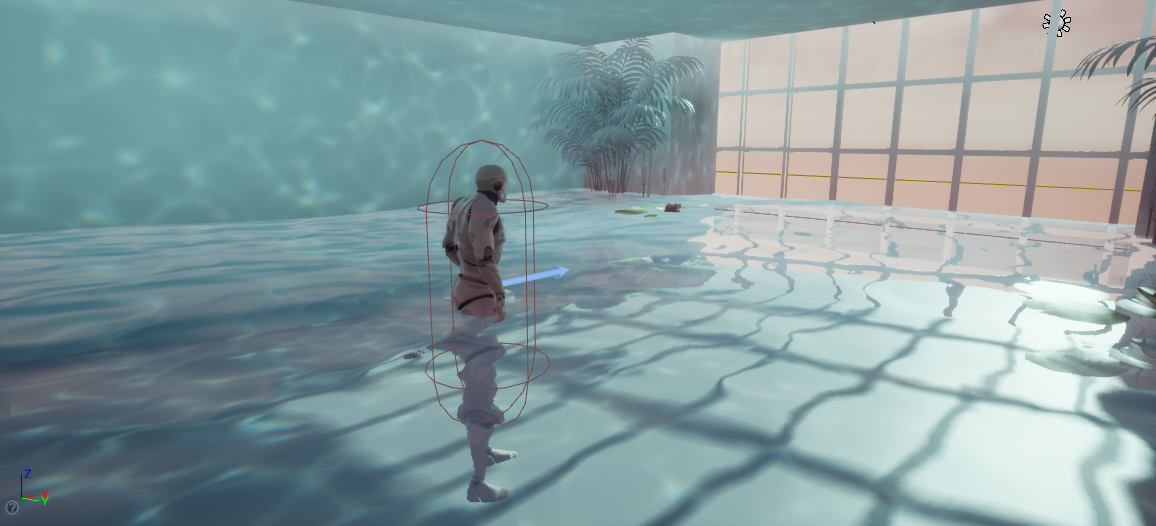
Now, I’ve finally started implementing the water mechanics, but they’re not really behaving the way I need them to just yet. I’ll definitely come back and update once they’re fully functional!
1950’s Diner
I haven’t really made much progress on this one as I wanted a bit of a change of scenery (hence the Zen Room), but I will most certainly go back to it after I’ve implemented water mechanics in my other project.
LOD tool
Haven’t touched this project in ages, but I still need to flatten some dictionaries for better data output; speaking of, I really need to figure out a way to output all my data to a log within a tool rather than the output log, so on the to-do list that goes!
That’s about it! If you’d like to see what I come up with next please keep an eye on here, hope you have a lovely day and take care! :)
You may remember I was working on a 1950’s diner project just about a week ago. Well, one morning I saw this photo on instagram and it immediately inspired me to wanna try doing something similar in Unreal Engine.
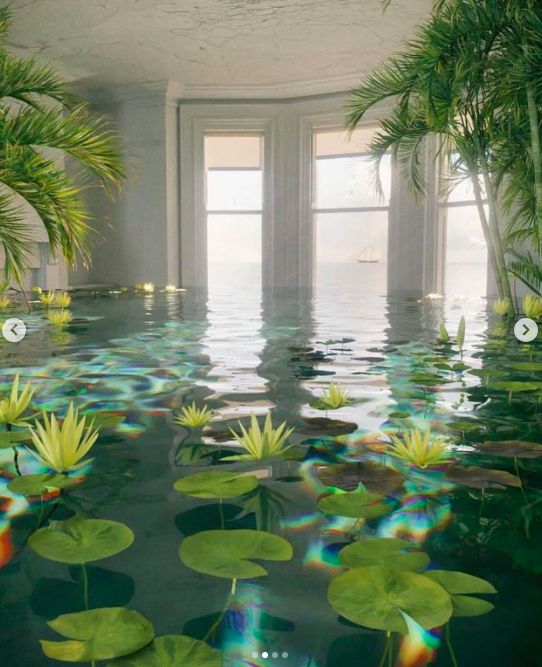
Using Lights to Achieve Caustics
After gathering some reference, the idea was to use lights in order to get the effect of water caustics. Here’s what that looked like:

And this is how I set up the light function:
However, during an interview I got asked what would be a more optimised way to get the same effect - and then I realised I should use a panning emissive texture instead on the walls and floor.
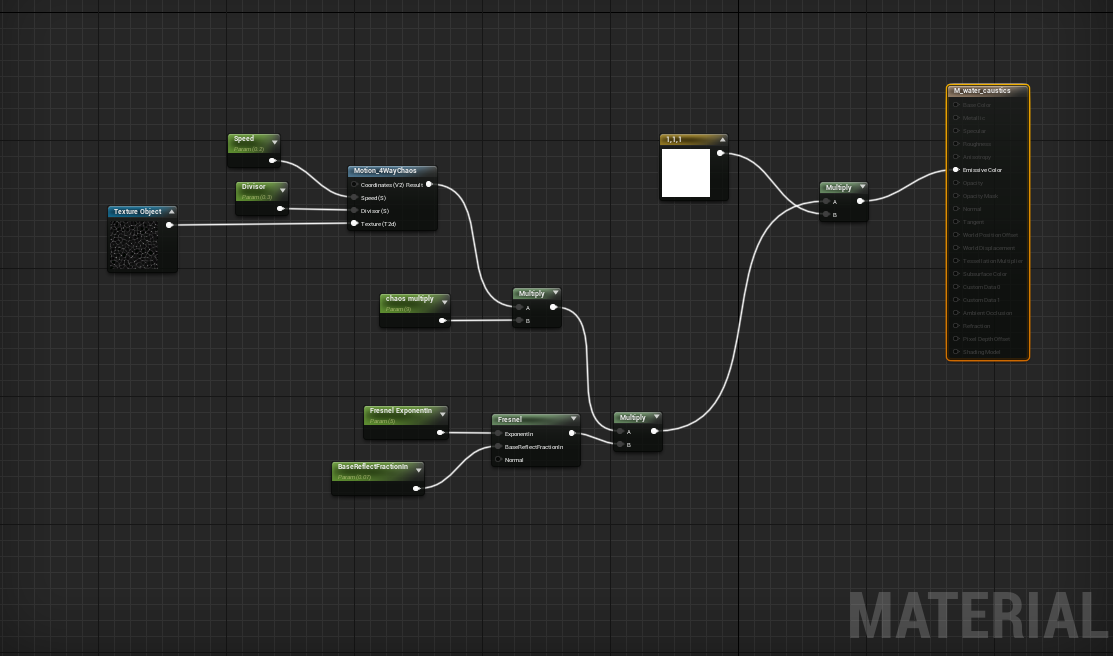
Doing Things the Better Way
Even though the lights were giving me the result I wanted, any technical artist would’ve screamed if they saw 3 lights being used that way. Dodged a bullet there.
Regardless, I initially set up the emissive texture the same way I set up the light function, using a Motion 4 Way node. Then I realised, during the same interview I got asked to delete that node and make it from scratch instead. That way I would get the result I wanted with as few instructions as possible, removing any bloat/functionality I didn’t need.
Here’s the new and improved effect:
And how it’s set up:
This scene has a grand total of one directional light at the moment. I’m quite happy with it, but I might increase the chromatic aberration on the texture a little bit.
Project Goals
The biggest goal for this project is to get the water to move with the player, probably using render targets. I would also like to add some custom specularity to it, so that it reflects the light in a pretty way.
I will most definitely update as soon as I get either of the two working in engine. I’ve already learned a lot during this project and I’ve only really started working on in a couple days ago. I’m happy to be able to say that each day is like a school day, the learning never stops and that’s what keeps tech art fun.
I’m also glad I was able to get such valuable feedback during my interview, and put it to good use straight away. Constructive feedback is an important part of development and I feel like I realise it now more than ever.
Anyway, that’s all for now, thank you so much for reading, take care and hope to see you on here again soon!
Wait, an Environment Art Project?
Well, yes.. and no. Although this project started as an environment art project last summer, I decided to take it in another direction now.
The original idea was really simple - make a 1950’s inspired diner environment, and perhaps experiment a bit with blueprints while at it. Now, it’s the other way around. I won’t focus as much on asset creation, and move my attention more towards lighting and making the level as interactive as possible.
Speaking of lighting
I’ve played around a bit with the setting of the diner, especially the lights. Here’s a comparison between it during the day and night.
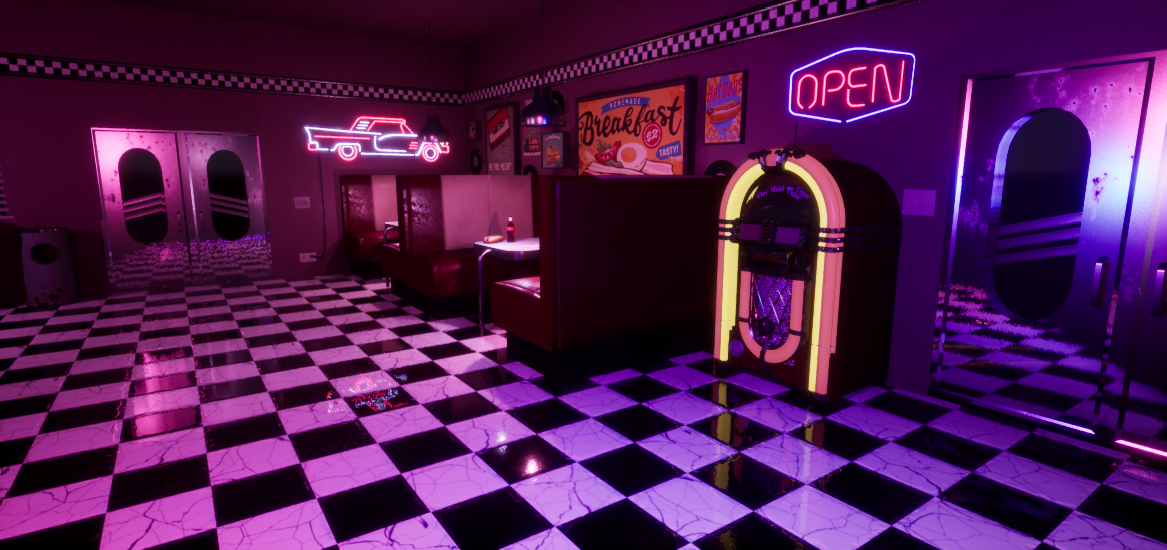
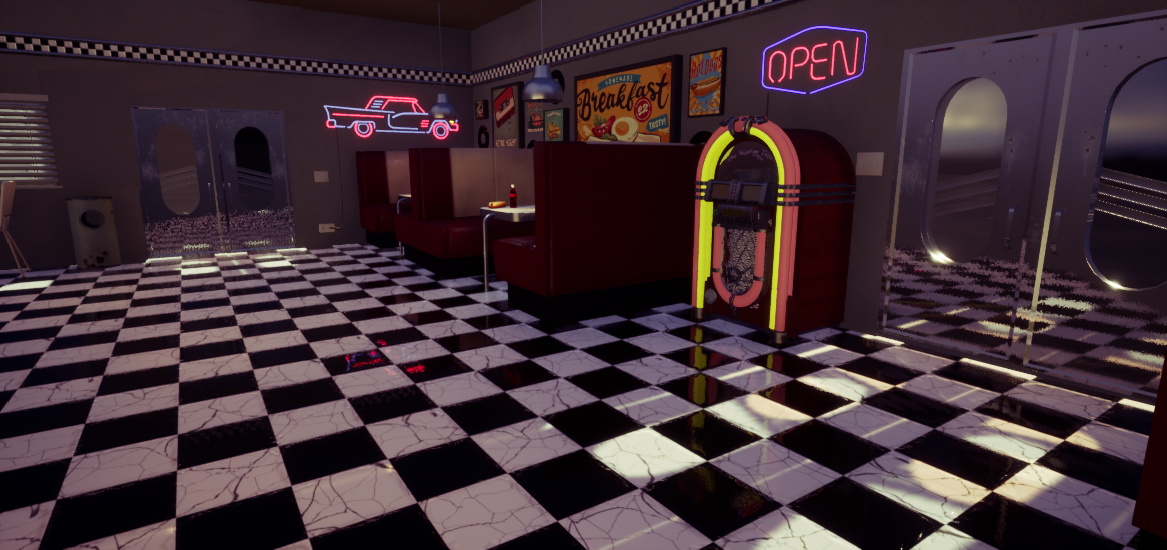
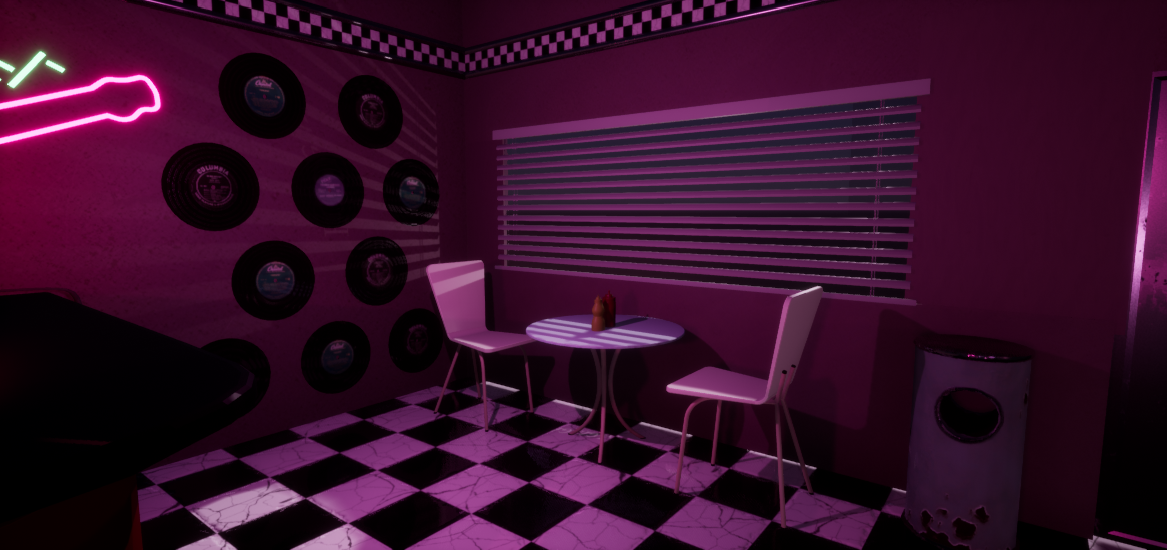
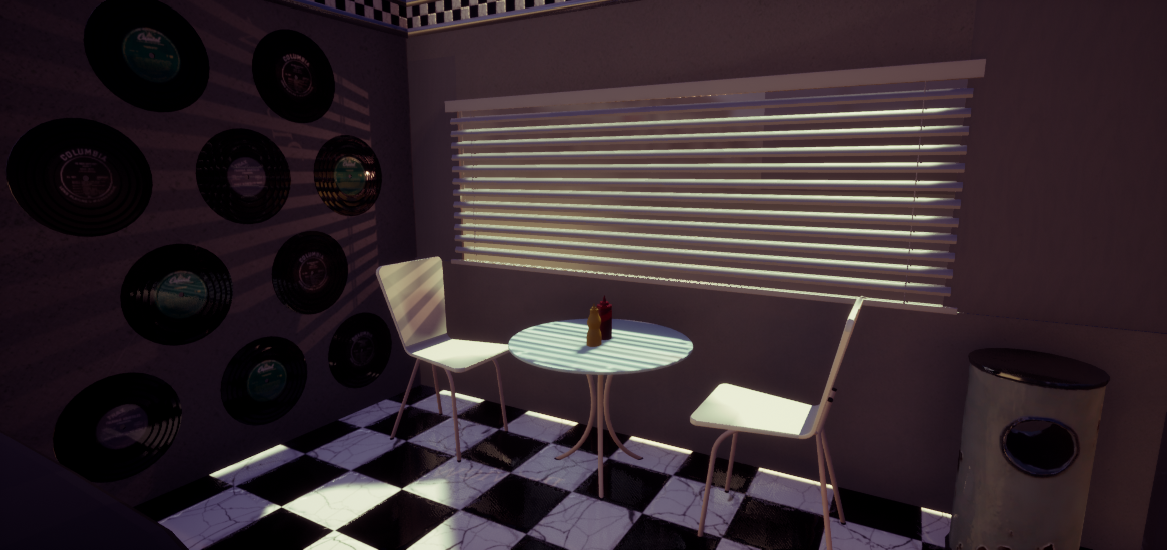
As of right now, I think I prefer the night setting a bit more, but that’s just because I’m more used to creating night environments, so I thought this would be a good opportunity to try something new.
Ok but where’s the tech?
Fear not, there’s plenty of techy stuff already in this level, and I plan to add much more. The main thing I want to show right now is my jukebox that actually plays music.
I also made a minimap (WIP) and I plan on making a coke vending machine/fridge of sorts soon.
Stay tuned for more updates on this project. See you soon!
One Month In
And two projects down. I’d lie if I said I wasn’t very happy with my speed this year. I have to admit, part of it was due to fear of not making my deadline (especially on my LOD tool project), and that really drove me to push myself and learn a lot of new things really fast. I feel really lucky to now be able to focus entirely on personal projects and making a career, however the thought of starting on my final major project early has crossed my mind a few times.
Last few bits and bobs
I can now finally say that I’m happy with the way the Shader Museum looks (considering it’s not an environment art project). I’ve added a directional light under the ground to create some cool shadows, tweaked the colour of the igloo’s walls a little bit and vois-la:
.png)
I’ll also quickly include a couple of videos of each shader.
Final Thoughts
Overall, I think that if I were to tackle another project of this sort in the future, I would start by making a moodboard and setting a theme for the environment rather than just jumping straight into the Material Editor. I was lucky enough to be able to make everything work with each other as I went, but I think having a set theme from the get go is definitely the way to go. Other than that, I’m happy with my time management and the order I did the rest of the things in, from making the first shader to making the footprints and bringing the igloo in.